Add Amazon SES Delivery Server
If you're not having an AWS account, create one. It's free to get started. Amazon SES will only ever charge you if you send more than 62,000 emails in a given month ($0.10 for every 1,000 emails thereafter).
Create AWS User
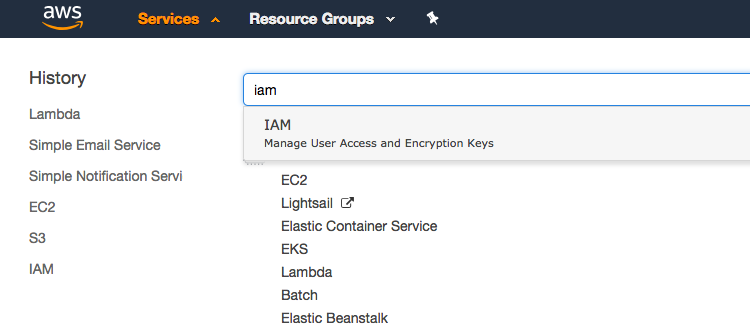
1) Log into your AWS console: https://console.aws.amazon.com/ and search for the service "IAM"
2) Go to your IAM add user screen.

3) Enter mailpixels (or any name of your choice) as the user name and choose Access key - Programmatic access for the Select AWS credential type.
4) Click the Next: Permissions button at the bottom. You'll be directed to Set Permissions page.
5) Click Attach existing policies directly option and a table will appear below.

6) Scroll or search the table until you see AmazonSESFullAccess and click the checkbox to the left of the row to select it. Make sure you've checked the right row.
7) Click the Next: Tags button, and Next: Review button and finally Create user button at the bottom.
8) Upon success, you should see a table with an Access key ID and a hidden Secret access key. Press Show so that you can see both keys.
Both Access key ID and Secret access key are required to create an Amazon SES Delivery server.
Add Delivery Server
1) Click on Delivery tab > Delivery Servers > Add Delivery Server.
2) Choose Amazon SES as Delivery Server type.
3) Name the Delivery Server. This name is just for your reference. Example: Amazon SES Delivery Server
4) Enter the Access key and Secret access key that you've just got under Connection & credentials configuration section.
5) Choose your preferred AWS Region. AWS regions are data centers in different geographical locations that you can use to build applications.
Which region you should choose depends on a few factors. If you've already been using SES in a
particular region, you can choose to use that region. Or, if you have an application using
other AWS services in a region, you choose to use the same region.
Otherwise, choosing the "US East (N. Virginia)" is probably best.
6) Configure Quota, Pause time based on your AWS account sending limits.
Move out of Sandbox
Amazon places all new SES accounts into Sandbox mode in order to prevent fraud and abuse.
Getting your account out of sandbox mode is easy.
1) Log into your AWS account: https://console.aws.amazon.com/ses/
2) Open a Service limit increase case in the Support Center. Fill out the form.
Most questions are optional, but answering more will improve the likelihood of getting approved.
Your request will be rejected if you have
| Limit Type | SES Sending Limits |
| Mail Type | Marketing |
| Website URL | Provide a link to your website. |
| Describe, in detail, how you will only send to recipients who have specifically requested your mail |
Describe how you are collecting the email addresses and how recipients opted in to receiving your emails.
Also mention how you are managing/respecting your recipient's Opt-in, Opt-out preferences.
|
| Describe, in detail, the process that you will follow when you receive bounce and complaint notifications | Mention that, such recipients will be automatically flagged and no further emails will be sent to them. |
| Will you will comply with AWS Service Terms and AUP | Read both documents, and only select Yes if your emails comply. |
| Region | Choose the same region which you've selected when creating the Delivery Server. |
| Limit | Desired Daily Sending Quota |
| New limit value | Enter the maximum number of emails that you will send in one day. This number can be increased later. |
| Use case description | Describe your business and how are you collecting the email addresses (recipients). Why recipients have to receive your email. |
3) Submit the form.
Amazon takes upto 48 hours to review and update your support case.